
How to Configure Your Google Analytics Account
Google Analytics is free and most businesses have it on their sites, but they aren’t configuring it correctly. If you’re starting from scratch, or are ready to get more out of the tool, follow our step-by-step guide to configure your Google Analytics account for success. This guide is the standard procedure we follow for our clients.
Below you’ll find setup tips, the basic filters for your views, the other accounts that should be linked to Google Analytics, and more.
Account vs. Property vs. View
First things first, you need to have a Google Analytics account and the tracking code installed properly on your site. If you’re brand new to GA, start here. If you’re already up and running, skip down to Views.
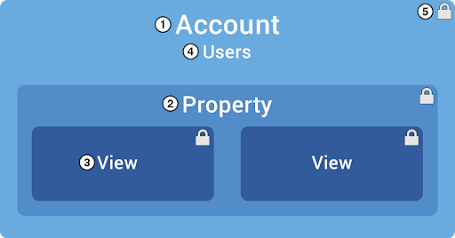
Accounts, Properties, and Views all are part of the hierarchy of your Google Analytics account. You can set them up a few different ways, but below I’ve got examples of how we set ours up at PINT, as well as what we recommend for our clients.
Below is a hierarchy illustration from Google:
Account
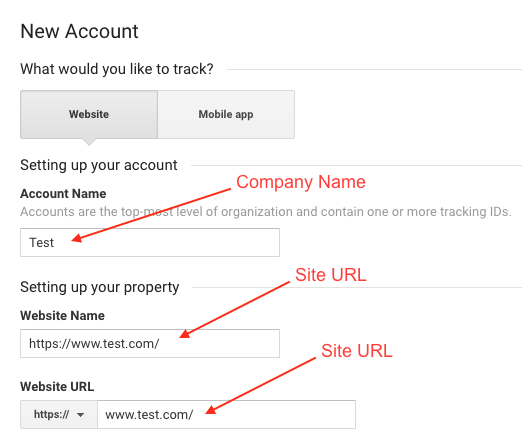
The Account is the highest level of Google Analytics. Name the Account the name of the company. For PINT, our account name is “PINT Sites.”
When you’re setting up your account, you will be prompted to immediately fill out the Account and Property name.
Property
A Property is the next tier and each property should equal one website or mobile application. Each property receives a unique tracking code. As such, distinguish each property by naming it the url of the property or “[company name] Production/Staging.” For PINT, our property name is “http://www.pint.com.”
In general, we recommend having one account and multiple properties if you have multiple sites for your company. For example, PINT has one account for our company sites, multiple properties for different sites, and multiple views per property:
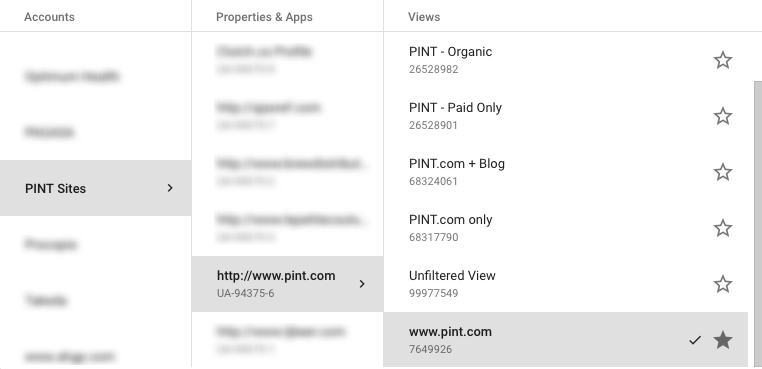
As you can see, there are other accounts we have access to, but these accounts are for separate lines of business or clients’ accounts.
Views
Views are the lowest tier of the Google Analytics account. Views are where you actually view data. The view should have the property name in it so it’s easy to distinguish on other configuration screens. The view name should denote what is in the view. For example, we have an unfiltered view named “Unfiltered View” and a view that shows data for only organic traffic called “PINT – Organic.”
Users
Users can be added at any level and given a variety of permissions at each level. Be careful about who has admin permissions as once data is filtered out of a view, it cannot be recovered. Read more about how users and permissions work.
Create Multiple Views in Google Analytics
Views collect and display data from the date they are created. Creating custom views from the beginning will help you analyze your data more easily. Each view serves a different purpose.
Below are the initial, basic views for your property. If you have any subdomains or specific traffic sources, those could also be separate views for the property. The need for a view should be based on the need to separate a certain section of data from other data.
All Website Data
This is the initial view that Google Analytics creates for you. DO NOT EDIT. This is your backup, everlasting record of your site. Leave it alone. Really. Just don’t touch it.
I name this view “Unfiltered View” or “All Website Data (DO NOT EDIT)” just to make sure the purpose of the view is clear.
Filtered
Create a filtered view that will be the authority for site traffic, conversions, etc. The filters outlined below will keep your site data clean and organized. These filters should be on every filtered view.
Hostname
This filter keeps out spam by only tracking traffic to the hostname of your site. Go to the Admin > View > Filters > +Add Filter.
- Create new Filter
- Filter Name: Hostname
- Filter Type: Predefined > Include only > traffic to the hostname > that contain
- Hostname: add in your site’s hostname. For PINT, this would be “pint.com” without the “https://” or a trailing slash.
- Save
Example:

Lowercase: Request URI
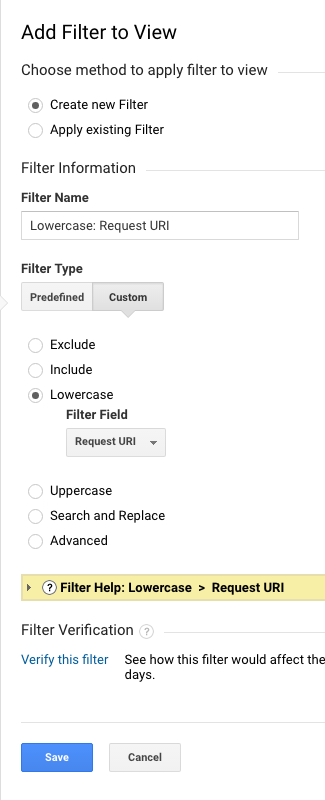
This filter consolidates example.com/About and example.com/about into one URI rather than treating it as two separate pages. Go to the Admin > View > Filters > +Add Filter.
- Create new Filter
- Filter Name: Lowercase: Request URI
- Filter Type: Custom > Lowercase > Request URI
- Save
Example:
Exclude IPs
This filter will exclude your company’s own traffic to the site that way it doesn’t skew your data. Go to the Admin > View > Filters > +Add Filter.
- Create new Filter
- Filter Name: Exclude [Company Name] IP
- Filter Type: Predefined > Exclude > Traffic from the IP addresses > that are equal to
- IP address: [your IP]
- Save
Example:
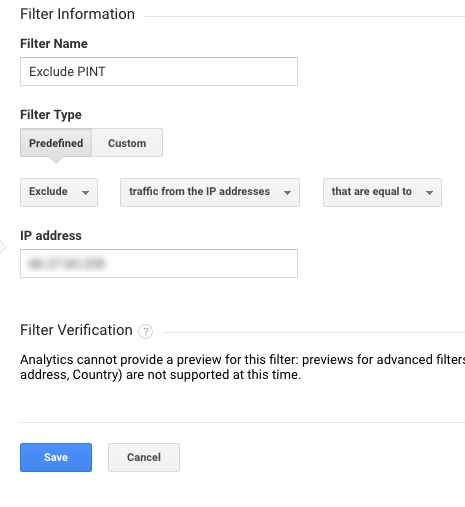
If you don’t know your IP, visit whatsmyip.org while at your office and it will tell you the public IP.
If you have multiple IP addresses, use this subnet filter:
- Create new Filter
- Filter Name: Exclude [Company Name] IP
- Filter Type: Predefined > Exclude > Traffic from the IP addresses > that begin with
- IP address: [the subnet for your IP]
- Save
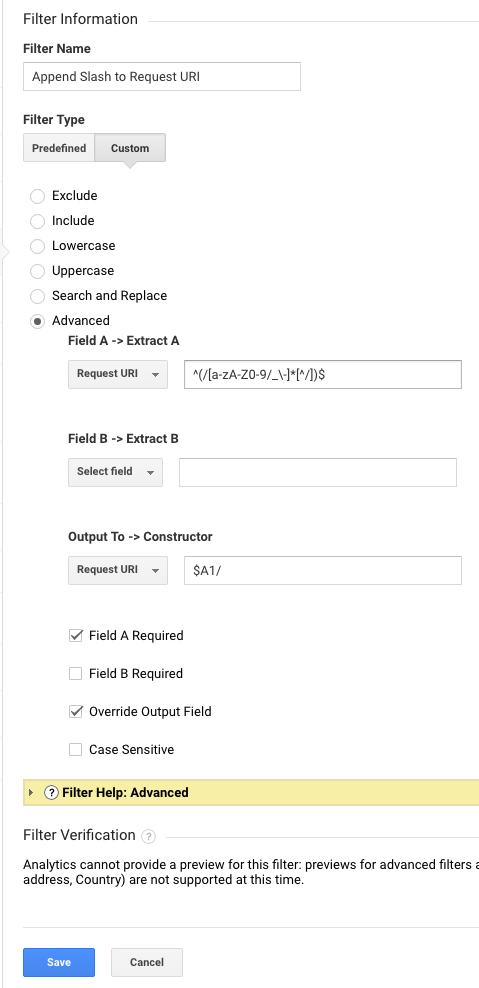
Append Slash to Request URI
This filter adds a slash to the end of the URL so that example.com/about and example.com/about/ are treated as the same page. Make sure that this is the LAST FILTER so it doesn’t interfere with other data.
- Filter Name: Append Slash to Request URI
- Filter Type: Custom > Advanced
- Field A -> Extract A: – Select Request URI
- Enter ^(/[a-zA-Z0-9/_-]*[^/])$
- Output To -> Constructor: – Select Request URI
- Enter $A1/
- Select Field A Required
- Select Override Output Field
Example:
Testing
Create a copy of your main view and implement any new filters or changes here. Once you know for sure that your updates are working the way you want them to, recreate them in the main view.
Using a test view helps keep your main view from getting infiltrated with bad data. Once data is documented in a view, there’s no getting rid of it.
Other View Settings
Site Search
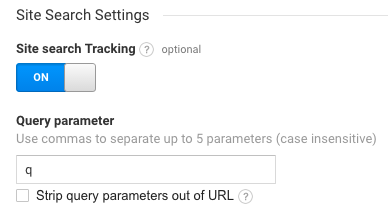
If you have a search function on your site, set up search tracking so that you can track the queries. This can help you determine content changes on your site.
While in the admin section, go to the view settings, turn site search tracking on, add the query parameter, and save. To find the query parameter for your site, search for something on the site and look at the URL for the parameter before the search term. For example, Google’s search parameter is the letter q.
https://www.google.com/search?q=testing+1+2+3

Note: You only need the letter, not the =.
Bot Filtering

Don’t do this for your unfiltered view as it should stay untouched, but for your other views, exclude known bots and spiders. Go to the View admin, check the box for bot filtering, and save. This will help keep your view data free of irrelevant traffic.
Connect Other Google Accounts
There are other Google services that you should connect to your Google Analytics account to provide greater insight into your site’s data.
Search Console
Linking your site’s Google Analytics account to your Search Console account will pass the search queries from Google to your Google Analytics account. Search Console is also a useful tool for monitoring and managing your search presence.
First, you have to create a Search Console account and verify your properties. Verify each property that is accessible to the public, meaning https://example.com, https://www.example.com, and other variations should all be verified. You can verify using Google Analytics as long as your GA tracking code has been placed appropriately.
After verifying your properties, choose your default property (what you want Google to favor). Go back to Google Analytics and go to the Property level settings.
 –>
–>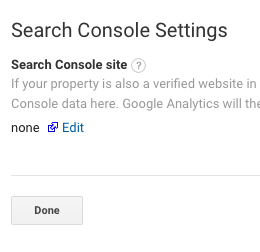
Click “Adjust Search Console” and click “Edit.” This will take you to Search Console.
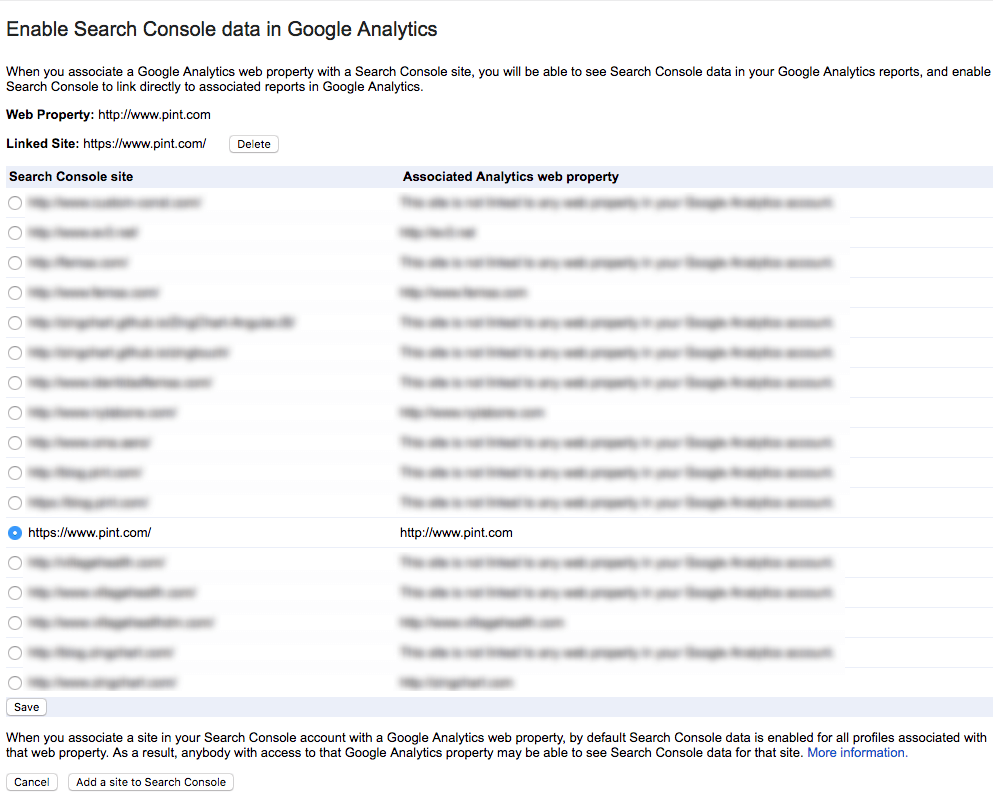
Finally, select the Search Console site and click “Save.” This will link the two accounts. When you navigate back to Google Analytics, it will look like it hasn’t changed, but refresh. You should see all the views that the query information will be passed to. Adjust if needed.
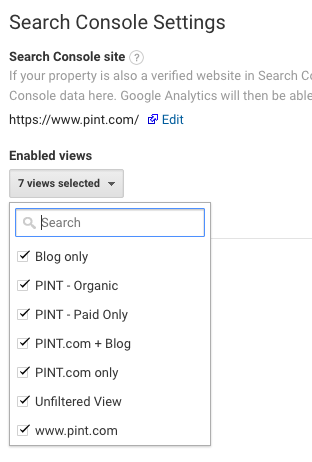
As you can see, ours is linked to each view. To view this linked data, go to Acquisition > Search Console.
Google AdWords
If you are running ads on the Google AdWords platform, link your Analytics and AdWords account so you can better track the user’s journey through your site. Go to the Property level settings and click “AdWords Linking” and then “+New Link Group.” The AdWords accounts your Google account has access to will appear here.

Select your AdWords account, then title the Link group. Turn on each view you’d like to pass data to. Click “Link accounts” to save the association.
To view this linked data, go to Acquisition > AdWords.
Now, your Google Analytics account is set up to provide you greater insights into your site traffic, how users get there, and what they’re doing. If you want some expert help getting configuring your Google Analytics account or taking the next step, get in touch. We’d be happy to help!